Corporate gift set packaging works best when the presentation box, internal product control, and shipping carton are planned as one connected system. A polished promotional gift set may look complete when opened, but the visible box still has to survive storage, stacking, transport, sorting, and final handoff. Good packaging planning therefore starts with the actual products, how they are packed, where they are going, and what the recipient should see first—not with artwork alone.
Corporate Gift Set Packaging as a Three-Layer System
Packaging decisions become easier when each layer has one clear job. The product-contact layer controls movement and contact. The presentation layer organizes the opening experience and brand message. The transport layer protects the completed set and makes it easier to count, route, and receive.
These layers are connected. Product dimensions determine insert depth; insert depth affects box height; the finished box size then affects carton count, shipping volume, storage space, and distribution handling. Approving the visible box before confirming the product arrangement can force avoidable changes later.
| Layer | Main Job | Typical Elements | Question to Approve |
|---|---|---|---|
| Product-contact | Control movement, contact, and orientation. | Insert, divider, pouch, wrap, card pocket, support pad. | Will every item stay stable and removable? |
| Presentation | Create visual order and guide the opening sequence. | Gift box, sleeve, card, sticker, tissue, message panel. | Does the first view look intentional and easy to understand? |
| Transport | Protect, count, sort, store, and route finished packs. | Inner carton, master carton, carton mark, destination label. | Can the carton be identified without opening it? |
| 1. Product ContactBottle, notebook, pen, cable, card → insert / divider / pouch. | → | 2. Presentation BoxOpening sequence, brand surface, card position, removal access. | → | 3. Shipping CartonProtection, quantity, destination, version, phase, reserve stock. |
Worked Example: One Set, Three Different Packaging Jobs
Consider a set containing a stainless-steel bottle, notebook, pen, and printed welcome card. The insert should stop the bottle from rolling into the notebook, keep the pen visible, and prevent the card from bending under a heavier item. Those are product-contact decisions. The presentation box then controls the first view: whether the card appears first, whether the bottle or notebook becomes the visual anchor, how much empty space remains around the products, and how easily each item can be lifted.
The master carton solves a different problem. If 20 finished sets are packed together, the carton must protect the presentation surfaces, keep that quantity stable during handling, and identify the destination without opening the individual boxes. If the same program has two departments or two event locations, the visible gift box may stay identical while the carton label carries the destination and allocation code.
| Decision | What to Check | What Can Go Wrong If Missed |
|---|---|---|
| Product-contact | Bottle movement, pen channel, card protection, removal clearance. | Rubbing, hidden parts, bent print material, awkward removal. |
| Presentation | First view, message order, branding surfaces, opening direction. | A visually busy box or an opening sequence that feels accidental. |
| Transport | Sets per carton, stacking, label fields, destination, reserve stock. | Marked gift boxes, uncertain counts, mixed destinations, difficult receiving. |
Choose the Box Around the Products and Distribution Route
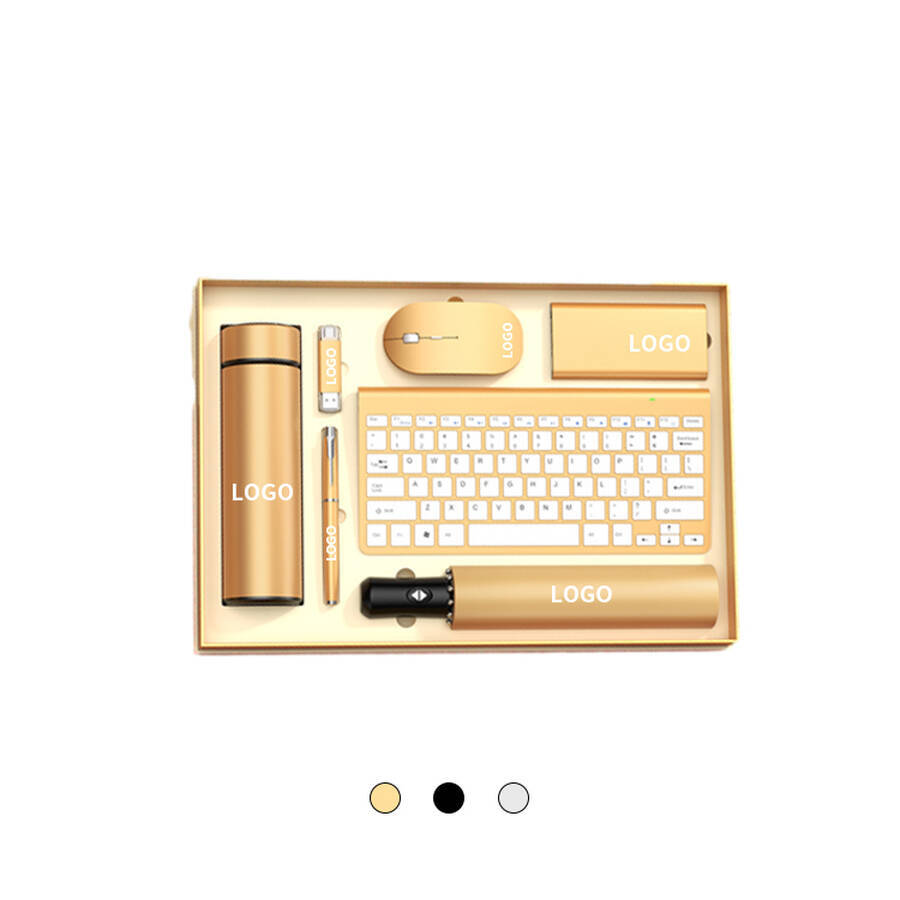
Box selection should start with actual product size, packed condition, opening style, distribution route, packing speed, and expected presentation level. Reference photos can establish a visual direction, but they should not decide the structure by themselves.
A folding box may suit lighter sets and programs that need efficient storage before assembly. A rigid-style box can create a more formal presentation but usually occupies more shipping volume. Drawer, book, and two-piece formats can control the reveal more carefully, although added structural parts also create more fit relationships and packing steps.
| Box Direction | Best Fit | Watch For |
|---|---|---|
| Folding box | Office programs, lighter sets, compact pre-assembly storage. | Closure security, setup time, stacked stability. |
| Rigid-style box | VIP, recognition, leadership, partner presentations. | Shipping volume, deep cavities, removal access. |
| Drawer / book / two-piece | Programs where opening sequence is part of the experience. | Extra components, assembly steps, moving-part fit. |
Use the Same Questions for Every Box Option
- How many items need to be visible at first opening?
- Which product creates the greatest height, weight, or pressure point?
- Will the set move through office handling, parcel delivery, conference staging, or formal handoff?
- Does one base box need to support several regions, languages, departments, or event versions?
- How quickly must each finished box be assembled, checked, and replenished?
- Will the visible presentation box enter a separate mailer or master carton before dispatch?
Put Permanent and Variable Information on Different Surfaces
The main box should not carry every message. Permanent brand identity can stay on the base box, while event dates, locations, languages, department names, or campaign lines are easier to manage on sleeves, cards, stickers, or removable panels. Destination and carton quantity belong on the shipping layer.
This separation matters when a program has several versions. A common box can stay stable while the card, sleeve, or carton label changes by region. Fewer structural versions mean fewer opportunities for sorting mistakes.
| Information | Better Surface | Reason |
|---|---|---|
| Long-term brand identity | Main box or durable product mark | Can remain across repeat programs. |
| Event / campaign / language | Sleeve, card, sticker, removable panel | Can change without rebuilding the box. |
| Set or department code | Small discreet code | Supports pack-out without dominating the design. |
| Destination / quantity / carton number | Outer carton label | Keeps logistics outside the presentation layer. |
When a More Premium Box Is Not the Better Choice
A heavier or more elaborate structure is not automatically the better corporate gift package. A rigid box can be appropriate for executive recognition or a private partner presentation, but it may be inefficient for a conference where hundreds of sets must be stored behind a registration desk and handed out quickly. A drawer structure can create a controlled reveal, yet it also adds parts, fit relationships, and assembly steps that may not improve the experience in a fast distribution setting.
Compare the box against the real route before approving it. If the set must be carried in a conference bag, stacked in limited venue storage, or split across many departments, compactness and repeatable handling may matter more than a dramatic opening mechanism. The right structure is the one that protects the products, supports the intended first impression, and still works at the required quantity and handoff speed.
For logo preparation and available decoration methods, see the KMSUPERB printing process. The final method still depends on the product material, print area, artwork, quantity, and box surface.
Use Inserts to Control Movement, Not Just to Fill the Box
An insert is useful when products can roll, slide, overlap, collide, hide beneath other items, or appear in the wrong orientation. Mixed sets often need more control because bottles, notebooks, pens, pouches, electronics, cards, and small accessories create different height and weight zones.
Not every project needs a fitted cavity. A divider can separate larger zones. A pouch or wrap can protect surfaces while allowing size variation. A paper band or simple support pad may be enough for controlled office distribution. The choice should match the amount of movement control and first-view precision the project actually needs.
| Control Method | Use When | Main Trade-Off |
|---|---|---|
| Fitted insert | Exact positions and a consistent first view are important. | Needs firmer product dimensions and less tolerance for substitutions. |
| Divider | Items need separation but some dimensional flexibility is useful. | Less precise visual control than a fitted cavity. |
| Pouch / wrap | Surface protection matters more than fixed orientation. | Loose protection can make the opening look less ordered. |
| Pocket / channel / band | Cards, pens, cables, or small items need dedicated positions. | Position must remain easy to load and easy to remove. |
Use Actual Packed Dimensions
Insert planning should use the product as it will actually enter the gift box. A bottle inside a protective pouch takes more space than the same bottle without wrapping. A cable in a retail box occupies more room than the same cable in a small bag. Handles, clips, raised buttons, charging ports, lid shapes, notebook closures, and other local high points also affect clearance.
Record length, width, height, packed condition, orientation, and any protruding features. If substitutions are still possible, identify which dimensions may change before deciding whether a fitted cavity is safe. Flexible divider zones tolerate variation better than exact-cut inserts.
Plan the First View and Removal Order Together
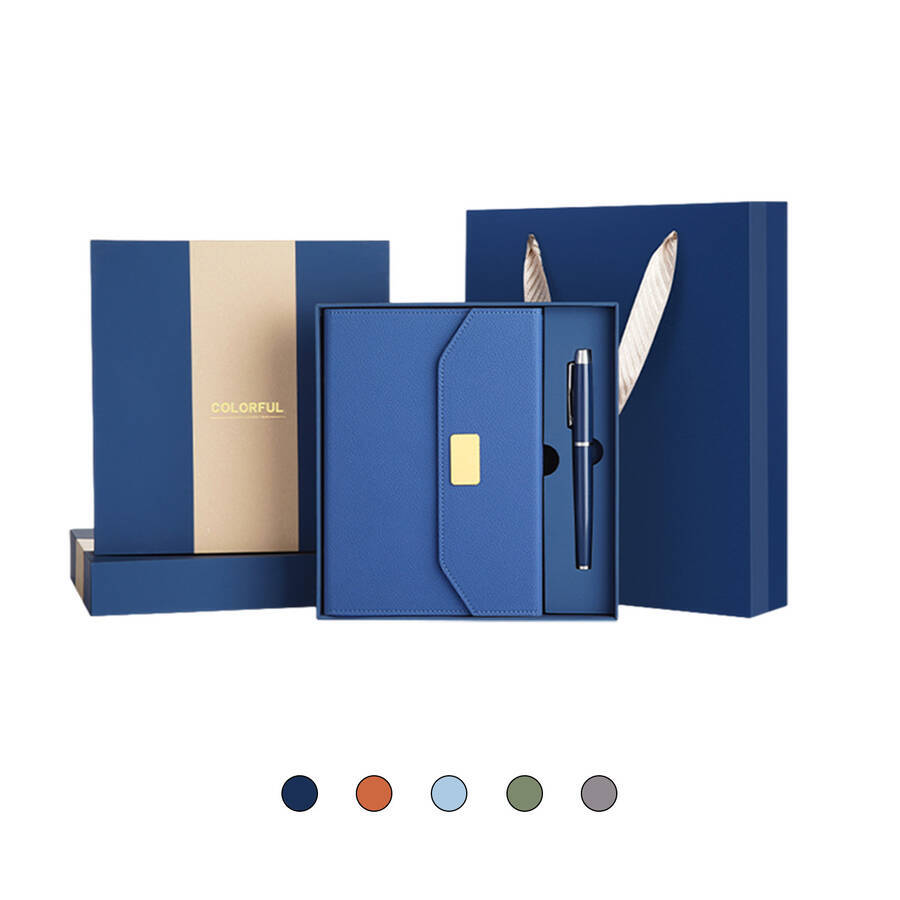
The first view should make the main item easy to recognize while keeping supporting products easy to find and count. A notebook can create a flat visual base, drinkware can anchor one side, a pen can sit in a narrow channel, and a card can appear above the insert or inside a lid pocket.
Visual order should not make removal difficult. Finger space, pull points, ribbons, and edge access matter when cavities are deep or products fit closely. A bottle should lift without scraping a notebook or card, and a cable should not be hidden under a larger product. Packing should follow the same logic in reverse so assembly remains repeatable.
Control Small Parts and Make Pack-Out Repeatable
Cables, adapters, instruction sheets, pins, small tools, and cards are easy to lose inside a mixed set. Give each variable or small component a visible position, pocket, envelope, or compartment. If several versions exist, use one code across the packing list, card, sleeve, and carton label.
The layout should also be practical at the packing table. Every bottle should face the same direction, every notebook should align to the same edge, and every card should enter the same position. Very tight cavities can reduce repeatability because small product variation makes loading difficult.
If the product combination itself is not yet stable, define that first. The guide on how to build business gift sets covers product roles and combination planning before the packaging structure is locked.
Plan Shipping Cartons Around the Distribution Route
The presentation box and shipping carton solve different problems. The visible box creates the recipient experience; the outer carton protects that experience and turns finished sets into countable distribution units. It should support stacking, storage, receiving, sorting, staged release, and destination control.
Carton quantity should follow how the sets will actually be received. Central office delivery can use larger grouped quantities. Conference desks may work better with smaller cartons that are easy to replenish. Individual mailing usually needs a separate shipping layer around the presentation box. Multi-location programs need clear destination and version control.
| Distribution Route | Presentation Priority | Protection / Handling | Label Priority |
|---|---|---|---|
| Office distribution | Clean opening and easy desk handoff. | Controlled stacking and internal movement. | Department, floor, team, batch. |
| Individual mailing | Presentation box should arrive clean. | Extra outer protection and movement control. | Address and route data outside the visible box. |
| Conference handout | Fast recognition and easy carrying. | Easy staging and quick replenishment. | Desk, session, zone, attendee group. |
| Formal / VIP handoff | Controlled reveal and message sequence. | Discreet protection before presentation. | Private allocation or meeting code. |
| Multi-location program | Shared base packaging with controlled regional differences. | Carton quantities matched to each local handoff. | Site, language/version, phase, reserve stock. |
What the Carton Label Should Control
Useful carton fields can include project code, destination, set version, quantity, carton sequence, distribution zone, and delivery phase. The largest text should show the field that matters most for sorting. Supporting details can sit below it.
Carton numbering such as “3 of 12” helps receiving teams reconcile the shipment. Reserve stock should have its own code instead of disappearing inside the general total. If a program has several sleeves, cards, or internal layouts, one pack code should connect the presentation version with the carton label.
| SYDNEY / ZONE BProject: AGM-26Version: AU-02 | Quantity24 setsCarton 3 of 8 | DistributionPhase 1Registration Desk |
The label is an operational control, not presentation artwork. Its job is to help staff route a sealed carton without opening individual gift boxes.
Worked Distribution Example: 1,000 Sets Across Several Destinations
Suppose a company orders 1,000 finished sets for one campaign: 400 for headquarters, 250 for conference venue A, 200 for venue B, and 150 as reserve stock. Treating all 1,000 sets as one undifferentiated packing quantity makes the production total simple but creates problems during receiving. The carton plan should reflect how each destination will actually use the sets.
| Allocation | Quantity | Useful Carton Logic | Label Focus |
|---|---|---|---|
| Headquarters | 400 | Larger grouped cartons if receiving and internal storage allow it. | Department / floor / batch. |
| Venue A | 250 | Smaller cartons sized for registration-desk replenishment. | Venue / zone / session. |
| Venue B | 200 | Separate destination grouping even if the set itself is identical. | Venue code / delivery phase. |
| Reserve | 150 | Keep sealed and separate from active distribution stock. | RESERVE / release authority. |
The exact sets-per-carton figure depends on finished box dimensions, carton strength, handling limits, and the receiving plan. The important point is that carton quantity is an operational decision, not just a packing-efficiency calculation. If venue A needs to replenish one desk at a time, cartons that are technically efficient for a central warehouse may be inconvenient on site. Allocation should be decided before final carton labels and packing instructions are approved.
Use a Version Matrix for Split Packing and Phased Delivery
A version matrix is useful when the same base set has different sleeves, cards, languages, departments, destinations, or delivery waves. Each row should describe one approved combination: box version, internal layout, card or sleeve version, destination, quantity, carton grouping, and phase.
Keep variation only where it serves a real purpose. Many nearly identical versions increase pack-out risk. Strong written codes work better than color alone because warehouse and event teams may be working quickly or under different lighting conditions.
Build the Packaging Brief Before Final Artwork
Most late packaging problems come from approving appearance before the operating details are stable. Words such as “premium,” “simple,” or “protective” are not enough. A useful brief describes the product list, packed condition, box direction, insert requirement, message hierarchy, distribution route, version logic, carton plan, and timing.
The brief does not need to be complicated. It needs to answer the decisions that affect fit, artwork, assembly, and delivery.
Core Packaging Brief
| Complete product list and packed condition | Quantity by version and destination |
| Actual dimensions and orientation | Logo file and brand reference |
| Preferred box direction | Insert / divider / pouch requirement |
| Card, sleeve, sticker, language versions | Carton label fields and carton count logic |
| Destination, allocation, reserve stock | Required arrival date and event date |
What the Packaging Team Can Evaluate From Your Inputs
A complete inquiry does more than speed up quoting. It allows the packaging review to move from vague style discussion to specific decisions about fit, structure, assembly, branding, and distribution.
| You Provide | What Can Be Evaluated | Why It Matters |
|---|---|---|
| Actual product and packed dimensions | Internal clearance, cavity depth, box size, product orientation. | Prevents approving a structure that only fits the bare product. |
| Quantity and version split | Common versus variable components, packing instructions, version control. | Reduces unnecessary structural versions and sorting risk. |
| Logo files and message hierarchy | Which information belongs on the box, sleeve, card, sticker, or product. | Keeps permanent branding separate from temporary campaign data. |
| Destination and delivery plan | Carton grouping, label fields, phased delivery, reserve-stock logic. | Makes receiving and final distribution easier to control. |
| Required arrival date | Approval sequence, sample timing, artwork sign-off, pack-out window. | Separates the actual receiving deadline from the event date. |
Pre-Production Sign-Off Should Cover More Than Artwork
A visual proof confirms artwork, but it does not confirm every packaging risk. Before full production, the review should also check the actual product fit, insert tolerance, removal access, opening direction, card or sleeve version, seal position, carton quantity, destination label, and pack-out sequence. If one product is substituted after the fit is approved, the affected clearance should be checked again rather than assuming the original cavity will still work.
For multi-version projects, keep one approved reference for each combination. The sample or specification should match the version matrix used by packing and shipping teams. This creates a cleaner handoff between design approval and physical fulfillment.
Common Packaging Mistakes to Avoid
Recommended Review Sequence
- Define the distribution route. Record office handoff, parcel delivery, event staging, VIP presentation, or multi-location delivery.
- Lock the item list and packed condition. Include pouches, retail boxes, wraps, cards, and optional components.
- Confirm actual dimensions and orientation. Note handles, clips, raised parts, and products that cannot be rotated.
- Choose the required control level. Decide whether the set needs a fitted insert, divider, pouch, pocket, or simple support.
- Approve box structure and opening logic. Check first view, removal access, closure security, and packing speed.
- Map permanent and variable information. Keep branding, campaign copy, version codes, and route data on the right surfaces.
- Build the carton and version matrix. Define sets per carton, destination grouping, split quantities, reserve stock, and delivery phases.
- Approve artwork and final pack-out separately. One visual proof should not replace checks for fit, labels, quantities, and assembly sequence.
Corporate Gift Set Packaging FAQ
What should be confirmed before choosing a corporate gift box?
Confirm the real item list, packed dimensions, orientation, distribution route, presentation level, quantity, and whether the program has different versions or destinations. The box should follow these inputs rather than force the products into a structure selected from appearance alone.
When does a gift set need a fitted insert?
A fitted insert is most useful when products can move, collide, rotate, or must appear in exact positions at first opening. If the project needs dimensional flexibility, a divider, pouch, pocket, or simpler support may be more practical.
Should the presentation box also be the shipping carton?
Usually the two roles should remain separate. Shipping cartons need to handle labels, stacking, counting, routing, and transport contact, while the presentation box should arrive clean and ready for the recipient.
What information helps KMSUPERB review packaging more efficiently?
Send the product list, actual packed dimensions, quantity by version, logo file, preferred box direction, insert requirement, destination allocation, carton grouping, and required arrival date. Reference images are useful for visual direction, but the technical review still depends on the real products and route.
Send the Packaging Inputs Before Asking for a Final Box Recommendation
A useful inquiry should show what must fit, what the recipient should see, and how the finished sets will be delivered. Prepare the actual product list and dimensions first, then add quantity, versions, logo files, destination split, carton requirements, and the required arrival date.
KMSUPERB can then review product fit, packaging direction, branding surfaces, and distribution requirements against the same project brief.
Send Packaging Project Details