Most customization problems do not begin with the camera itself. They begin with an unclear logo file, crowded cover text, an outdated event date, or approval sent from the wrong artwork version.
A structured brief keeps personalized disposable cameras aligned from the first design draft through packaging and delivery. The practical goal is simple: give the supplier one controlled set of artwork, copy, packaging instructions, approval details, and delivery information.
Build One Reliable Brief Before Design Begins
A custom disposable camera project can look simple until different teams begin supplying logos, event wording, packaging notes, quantities, and shipping instructions. The safest starting point is one master brief rather than several emails, chats, and spreadsheets.
That brief should identify the project, confirmed event date, quantity, customization scope, packaging format, destination, required arrival date, and the people responsible for comments and final approval.
Create One Source of Truth
Keep approved wording and artwork references in the same controlled document. Copy should come from that source rather than being retyped from invitations, screenshots, or memory.
Mark each field as fixed, pending, or optional. A confirmed logo and event date should not be treated the same way as an optional hashtag or a background treatment that is still under review.
Separate Shared Design from Variable Event Data
For a single event, most information may stay common across the order. Multi-location or multi-session projects are different: venue names, languages, table codes, dates, quantities, or receiving details may change while the main visual identity stays the same.
Keep those changing fields in a separate variable-data sheet instead of creating unrelated artwork files for every destination. This makes it easier to see what is intentionally different and what should remain identical across the project.
Give Comments and Approval Different Owners
Marketing, procurement, event operations, branding, and logistics may all need input, but several reviewers should not issue competing instructions. One coordinator should consolidate comments into a single revision list.
Final production approval should come from one authorized person who names the exact proof version being approved. This keeps the change history traceable and prevents an outdated draft from returning later.
Artwork Checklist for Personalized Disposable Cameras
Artwork preparation affects logo sharpness, color communication, layout flexibility, and proof accuracy. A clean submission package saves more time than trying to repair weak files after the cover design is already underway.
Start with the Best Source File
Use editable vector artwork when available. AI, EPS, PDF, and SVG are common formats, although the extension alone does not guarantee that the logo inside remains editable. Open the file and confirm that the approved proportions, current wording, and correct logo version are present.
If only raster artwork is available, send the largest original PNG, TIFF, PSD, or JPEG rather than a screenshot or an image copied from a website. A transparent PNG may work for some layouts, but the supplier still needs to review resolution, background treatment, and the selected printing surface.
Keep Fonts, Colors, and Copy Controlled
Keep text editable while wording is still changing, then provide an outlined production version once copy is approved. Include font names and a plain-text copy sheet so spelling, capitalization, dates, and instructions can be checked independently of the artwork.
For important brand colors, provide Pantone references, CMYK values, RGB values, or the approved brand guide instead of relying on screenshots. Also identify which colors are critical and whether the artwork uses gradients, photographs, fine lines, white graphics, or dark backgrounds.
Treat QR Codes as Both Artwork and a Live Link
Send the QR graphic together with its written destination. The link owner should confirm that the correct page will remain available during the event and that any redirects or campaign timing are intentional.
Test the code from the approved proof at realistic size. A QR code that works when enlarged on a monitor may become difficult to scan after it is reduced and surrounded by other cover elements.
Once the artwork package is clean, proof confirmation, production preparation, inspection, and packing should follow a traceable workflow. The KMSUPERB printing process outlines the stages that follow artwork submission.
Review the Print WorkflowUse Clear Version Names
A filename should reveal the project, component, version, issue date, and status. Avoid labels such as “final,” “new final,” or “latest final” that become meaningless after several revisions.
Example: EventName_CameraCover_V03_2026-09-06_Approved. If approved artwork changes later, issue a new version instead of overwriting the file.
Which project does it belong to? Which component does it control? Is it still under review or already approved? If the filename cannot answer those questions, the project team is more likely to open the wrong file during a later proof round.
Cover Layout and Readability
A camera cover has limited visual space. It should communicate one main identity first, then support it with only the event details or instructions that genuinely need to be visible on the camera.
Lock Identity and Factual Details Before Styling
Give the logo enough open space and use the approved horizontal, stacked, or icon-only version without stretching or rebuilding it. Event names should match invitations, registration pages, and signage, including punctuation and capitalization.
Use an unambiguous date format, especially for international events. Writing the month in words usually reduces confusion, and the same approved form should be used across the cover, insert, box, and carton label where the date appears.
Keep Secondary Content in Its Place
A short message can add tone or explain an action, but a paragraph usually competes with the event identity. Move detailed instructions to an insert card, table sign, side panel, or digital page instead of shrinking everything to fit.
Treat the QR code as a functional element, not decoration. Give it clear space, confirm the destination, and avoid placing small text or graphics so close that scanning becomes unreliable.
Respect Safe Areas and Physical Direction
Essential wording should remain clear of cuts, folds, seams, curved edges, openings, and overlapping panels. The selected layout must also respect the lens, flash, viewfinder, shutter area, film controls, and any required instruction space.
Every proof should identify front, back, top, bottom, left, and right. A flat design can look correct on screen while ending up reversed or misaligned once wrapped around the camera.
Check the Cover in Its Real Use Context
A design that looks balanced on a large monitor can feel very different when the camera is placed on a table, handed to a guest, or viewed under event lighting. Check whether the identity is still obvious at normal viewing distance and whether important instructions can be found without turning the camera several times.
This is also the right point to remove decorative content that does not help recognition or use. Small surfaces usually improve when one or two secondary elements are removed rather than made smaller.
Review at Three Sizes
If the project is still deciding between stickers, screen printing, paper boxes, or other cover approaches, review the separate guide to custom disposable camera covers. This article stays focused on the information buyers should prepare before approval.
Review Cover OptionsEvent Packaging and Product Direction
Packaging should support the way cameras are shipped, distributed, used, collected, and counted. The best package is not the one with the most printed information; it is the one that places each message where it is useful.
Put Each Message on the Right Layer
Use the camera cover or sleeve for identity and short visible information. Move longer operating or collection instructions to an insert card. Inner packing should help event teams sort quantities by room, table section, venue zone, office, or language.
Outer cartons should prioritize operational data such as destination, receiving contact, carton count, and project code. Decorative campaign copy has little value if it makes receiving information harder to see.
| Packaging Level | Best Use | Keep Off This Layer |
|---|---|---|
| Camera cover | Logo, event name, date, short message | Long instructions |
| Sleeve or box | Presentation, return note, group code | Shipping details |
| Instruction card | Use, return and QR guidance | Dense promotional copy |
| Inner packing | Group, quantity, zone, sequence | Decorative slogans |
| Outer carton | Destination, contact, count, project code | Small promotional wording |
Make Return and Handling Instructions Specific
If cameras are collected after the activity, name the actual return point. “Return to the registration desk” is more useful than a vague reminder with no location or responsible team.
Environmental or disposal wording should also be based on a confirmed handling process. Avoid unsupported recycling or recovery claims. If local instructions are required, place the approved wording in the master brief before the final proof round.
Plan Variable Packaging Before Duplicating Artwork
If several venues share the same camera design but need different languages, table codes, destination labels, or inserts, decide which components are common and which are variable before creating separate files. A master design plus a controlled data sheet is usually easier to review than many nearly identical layouts.
Use a short location or group code on the data sheet, filename, packing list, and carton label. That code gives design, packing, and receiving teams the same reference without forcing operational information onto the camera cover itself.
If a small logo and a clean box already meet the brief, adding a fully decorated wrap, extra insert, and multiple printed panels may create more approvals without improving the guest experience. Add a component only when it has a clear visual or operational job.
Choose the Product Direction by Event Use
A highly themed wrap can suit weddings, celebrations, or brand activations where the camera itself is part of the visual experience. Restrained branding with coordinated packaging may be easier for conferences, internal programs, sponsorship kits, and other projects where approval simplicity matters more than decoration.

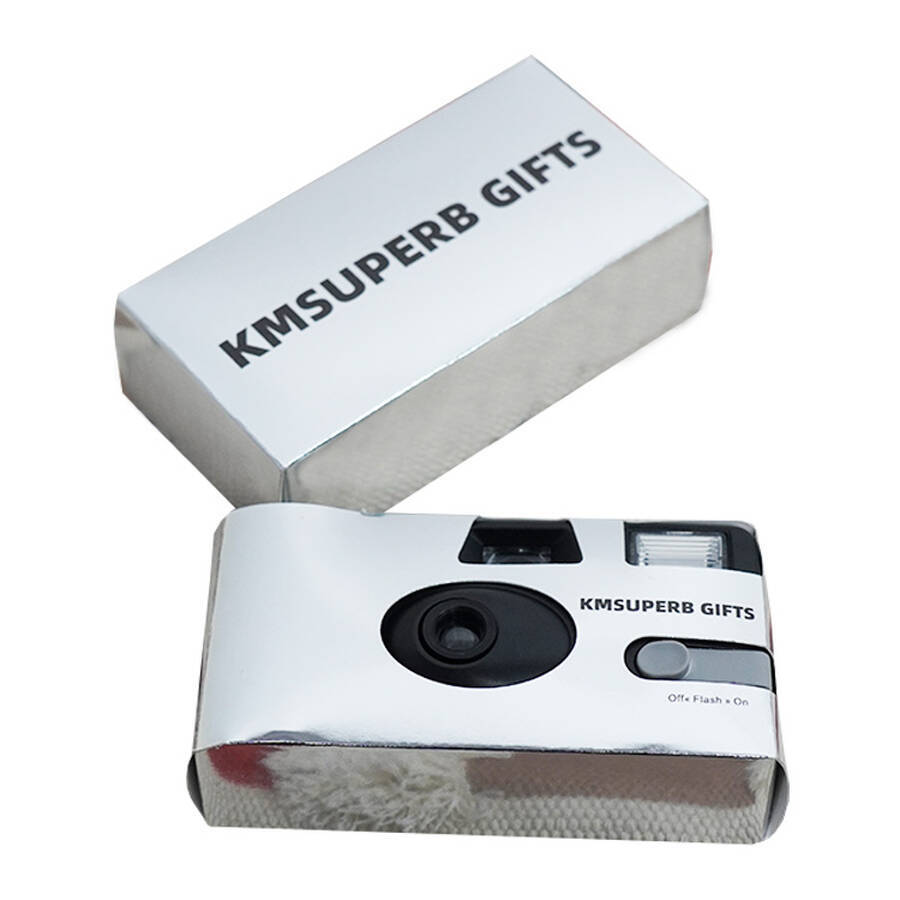
| Project Need | Direction | Main Check |
|---|---|---|
| Strong visual theme | Full wrapped design | Panel alignment and artwork direction |
| Formal corporate use | Restrained logo treatment | Logo contrast and box wording |
| Table-based activity | Event cover plus return card | Collection point and table allocation |
| Several destinations | One master design with controlled variables | Codes, quantities and arrival dates |
Use, presentation, packaging, approval complexity, and on-site handling should all influence the final choice. Browse the wider Camera Zone or the events and occasions range if neither direction above fits the project.
Proof Approval and Event-Date Checkpoints
A proof is both a visual preview and a controlled record of wording, placement, orientation, packaging, and revisions. Each version should identify the project, component, issue date, version number, and review status.
1 · Confirm the current brief
Before reviewing design details, make sure the controlled brief is still current and any pending fields are clearly marked.
2 · Review hierarchy and structure
Check logo placement, text balance, cover direction, packaging structure, and QR destination before focusing on small cosmetic changes.
3 · Consolidate revisions
One coordinator should issue a numbered revision list that identifies the proof version, panel, current content, and required change.
4 · Check copy and actual size
Verify names, dates, codes, links, phone numbers, QR scanning, small text, contrast, folds, and safe areas against the controlling source.
5 · Approve and lock the version
The authorized approver should name the exact final proof. Any later change should create a new version and repeat the relevant checks.
Avoid a general “looks good.” Written approval should identify the final proof and confirm that the logo, wording, date, QR destination, cover direction, packaging labels, and quantity have been checked.
Freeze Copy Before the Last Proof
Late additions can change line breaks, spacing, panel balance, and approval timing. Set a copy-freeze point so optional wording does not keep reopening a layout that is otherwise ready.
Essential corrections can still be made, but they should trigger a new proof version and a focused recheck of the affected component.
Know Which Changes Need Another Proof
A spelling correction, new date, changed QR destination, revised logo, different panel direction, or packaging label change should not be treated as an invisible administrative update. Each can affect what is printed or where it appears.
When one of those items changes after approval, issue a new proof for the affected component and confirm only the areas that need to be reopened. That keeps control without forcing the entire project through a full review again.
Plan Delivery from the First Operational Need
Do not plan only from the public event date. Cameras may need to arrive earlier for inspection, sorting, venue transfer, setup, or staff briefing. Actual timing depends on product, quantity, customization, packaging, approval date, destination, and shipping arrangement.
Record the full receiving point rather than only a hotel, campus, warehouse, or company name. Large venues may require a department, entrance, delivery reference, receiving hours, appointment, contact name, or phone number.
For several destinations, use destination-specific quantities, artwork versions, contacts, packaging variations, and required arrival dates. A simple location code can connect artwork files, packing lists, and carton labels without changing the master design.
| Destination Field | Confirm | Reason |
|---|---|---|
| Location code | One code per venue or delivery point | Connects artwork, packing and receiving records |
| Quantity & version | Correct quantity, cover, insert and language | Prevents similar packs being mixed |
| Receiving contact | Department, contact, phone and reference | Gets the shipment beyond the street address |
| Required arrival date | Date needed for inspection or setup | Keeps planning tied to the operational need |
Final Buyer Checklist for Personalized Disposable Cameras
Before requesting final artwork or a quotation, send one controlled project package. Mark anything that is still pending instead of letting an assumption become part of the proof.
Send the Product, Artwork, Packaging, and Delivery Details Together
If the event date is fixed, include the date the cameras must actually arrive for inspection or setup. If artwork is still pending, identify what is fixed and what remains open.