Choose by distribution method: bulk for fast booth handout, boxed units for controlled packs, and gift sets for planned VIP or speaker programs.

Three Packaging Routes with Different Jobs
A packaging decision should begin with one practical question: what must happen after the cartons reach the venue? General handout stock needs quick access and simple replenishment. Controlled programs need defined units that remain easy to count. Premium programs need complete sets that stay separate from open booth inventory.
Divide the total order by distribution purpose before selecting the package. One quantity may support public booth traffic, another registration or staff packs, and a smaller quantity speakers or planned meetings. This split also makes carton labels, storage zones, reserve stock, and closing counts easier to manage.
Bulk Pack
Best for fast, high-volume handout. Equal inner groups, clean refill containers, and clear carton quantities reduce opening work during busy booth periods.
Individual Box
Best for registration, appointments, staff kits, and prepared packs. One box creates one visible unit for allocation, protection, and stock recognition.
Gift Set
Best for speakers, hosts, senior guests, and smaller meeting programs where presentation, completeness, and controlled release matter.
Divide the Quantity Before Discussing Package Details
Record the full event quantity, then separate open handout stock from controlled packs and planned gifts. Keep reserve stock visible as its own line for later event days or unexpected traffic. This prevents one packaging route from creating unnecessary work across the entire order.
A large exhibition may need several refill groups each day, while the registration desk receives individually boxed units beside badges and schedules. A speaker program may need complete sets labeled by room or session. The fan can remain the same while the handling method changes.
A 1,500-piece fan order does not have to use one package. The event team might allocate 1,100 units to grouped bulk stock for booth visitors, 300 individually boxed units to registration and staff kits, and 100 units to speaker or VIP sets. The exact numbers will vary, but defining the split first lets each route receive the correct inner packing, carton labels, storage location, and reserve plan.
Define the Unit That the Event Team Will Count
Each route needs one clear count unit. Bulk stock may use an inner bag, refill bin, or individual item. Boxed stock normally uses one box. Premium programs should count one completed set instead of recounting every component during distribution.
Use the same count wording on the outer label, packing list, storage map, shift sheet, and closing record. A carton marked “100 units” can confuse a team that tracks “10 refill bags.” A clearer label can show both figures, such as ten groups with ten items in each group.
Match Packaging to the Real Storage Area
Trade-show storage often sits under tables, behind display walls, or inside a shared back room. Package size therefore affects more than shipping. A carton that is convenient in a warehouse may be awkward under a booth counter, and tall stacks of individual boxes can block access to active stock.
Before approval, identify the active stock zone, reserve zone, waste point, and staff path. Bulk groups can stay close to the booth while reserve cartons remain farther away. Gift sets normally need a more controlled location because they should not mix with public giveaway stock.
Waste capacity also matters. Individual boxes and gift sets create more packaging material during opening and assembly, while some cartons need to remain intact for leftover stock. Plan a retained-carton area instead of flattening every carton as soon as it is opened.
Practical rule: every package should make the next action clear. Staff should know what is inside, where it belongs, how it is counted, and when it enters distribution.
Check Fan-Specific Packing Data Before Final Approval
The route decision comes first, but the physical package must still be built around the selected fan. Do not approve insert sizes, inner quantities, or master-carton layouts from generic assumptions. Confirm the actual product configuration and the components that will ship with it.
These details turn a general packaging preference into a usable event plan. They also make freight, booth storage, and replenishment comparisons more realistic before final approval.
Confirm the selected model, packed dimensions, included accessories, and whether the unit will ship loose in grouped protection, in an individual box, or as part of a complete set.
Confirm the preferred handling unit for booth replenishment: loose units, grouped bags, prepared refill groups, boxed stacks, or completed sets. The quantity should match the event workflow rather than an arbitrary production number.
Confirm units per carton, carton dimensions, carton weight, version or color mapping, and the final destination label. These details determine storage pressure, receiving checks, and replenishment planning.
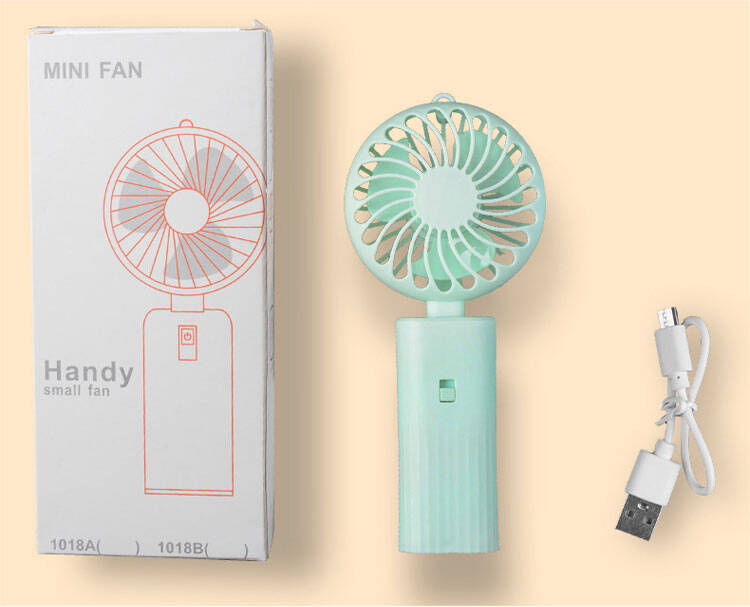
Bulk Pack for Speed, Individual Box for Control
The same portable fan can create very different work at the venue. Bulk packing reduces opening steps during public handout; individual boxes create a defined unit for registration, meetings, and prepared kits.
Bulk Pack for Fast Booth Replenishment
Open booth distribution often happens while staff explain products, scan badges, and answer questions. Every extra opening step can slow that sequence. Active stock should therefore move from the carton to the booth in a few predictable actions.
Equal inner groups support fast counts, cleaner storage, and simple transfer records. One sealed group can move into a prepared tray, and one refill can be recorded without counting every item again.
The best group size depends on daily volume and physical handling. A very large group may be awkward under a counter, while very small groups create more bags and opening steps. Set the inner quantity around the refill plan.
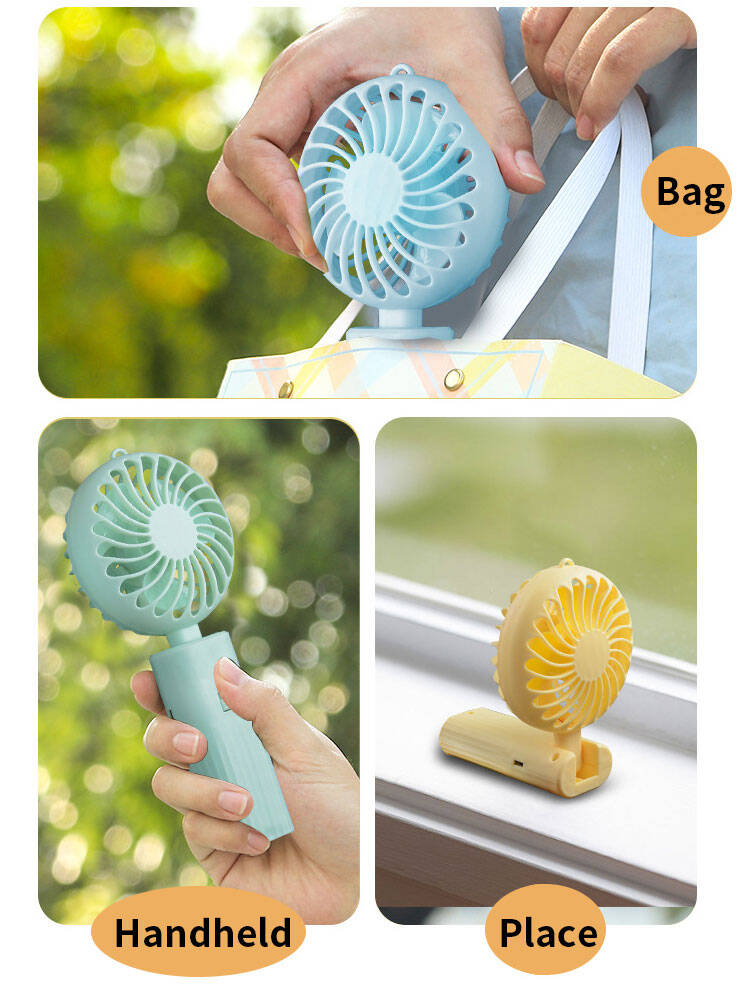
Loose Bulk, Grouped Bags, or Shift Packs
Loose bulk minimizes package components when products remain protected and clean refill containers are ready. Grouped bags add dust protection and faster counting, while shift packs can assign one group to a morning, afternoon, or session.
Use fixed refill quantities and simple tally marks so staff do not stop the booth for full recounts. At closing, separate active leftovers, unopened reserve stock, damage, and transfers.
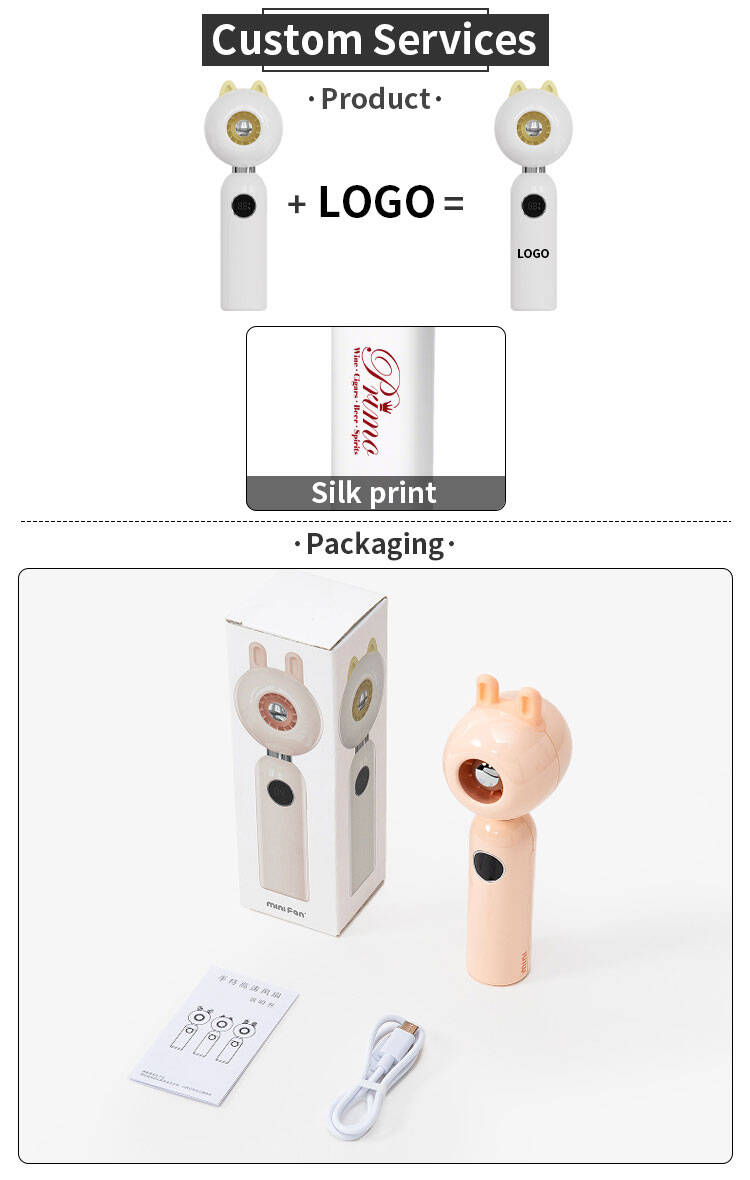
This KMSUPERB fan example shows branded customization, an individual box, cable, and instruction sheet. It is relevant to registration packs, staff kits, appointments, and other controlled handover programs.
View Boxed Fan ProductIndividual Boxes for Registration and Appointments
Registration desks often combine badges, folders, schedules, and branded items. One box lets a single fan move through kit assembly as a defined unit without exposing the product, making final pack counts easier to verify.
Scheduled meetings benefit from the same control. Boxed units can be allocated by day, room, or session, and clear outer labels can direct each carton to the correct preparation area before the venue opens.
Review the full kit layout before approval. A wide or tall fan box may disrupt a slim document pack or reduce stacking efficiency. The individual package has to work with the rest of the kit, not only with the fan.
Gift Set Options for VIP and Speaker Programs
A gift set should support a planned program rather than general booth traffic. It may serve speakers, hosts, senior guests, or selected meeting groups. Set quantity, component order, insert layout, card placement, and room routing all need clear approval.
Presentation matters, but operations still determine whether the set succeeds. A polished package can fail when cards are assembled in the wrong sequence or cartons reach the wrong room. The packaging brief should cover assembly and on-site distribution together.
Build the Set Around One Event Moment
Build the set around one event moment. A conference pack may pair the fan with a notebook, pen, or message card; an outdoor program may add a pouch or practical accessory.
Keep the component list focused. Every extra item adds sourcing, inspection, packing, and count work.
Use Inserts to Control Position and Completeness
An insert holds each component in a planned position, reduces movement during transport, and creates an orderly opening. Empty positions also make missing components easier to spot during assembly.
The fit should not be too tight or too loose. Items should lift out without force while remaining controlled in transit. Final insert dimensions should follow confirmed product data and approved components rather than generic assumptions.
Place Cards Where the Message Will Be Seen
A printed card can identify a speaker program, explain the event message, or add simple use guidance. It should be visible when the box opens instead of sitting underneath the products.
Top cards, lid cards, or dedicated slots can improve visibility, but the card should not block the main item or create pressure inside the lid. Named cards need careful file control for spelling, sequence, room assignment, and spare quantity.
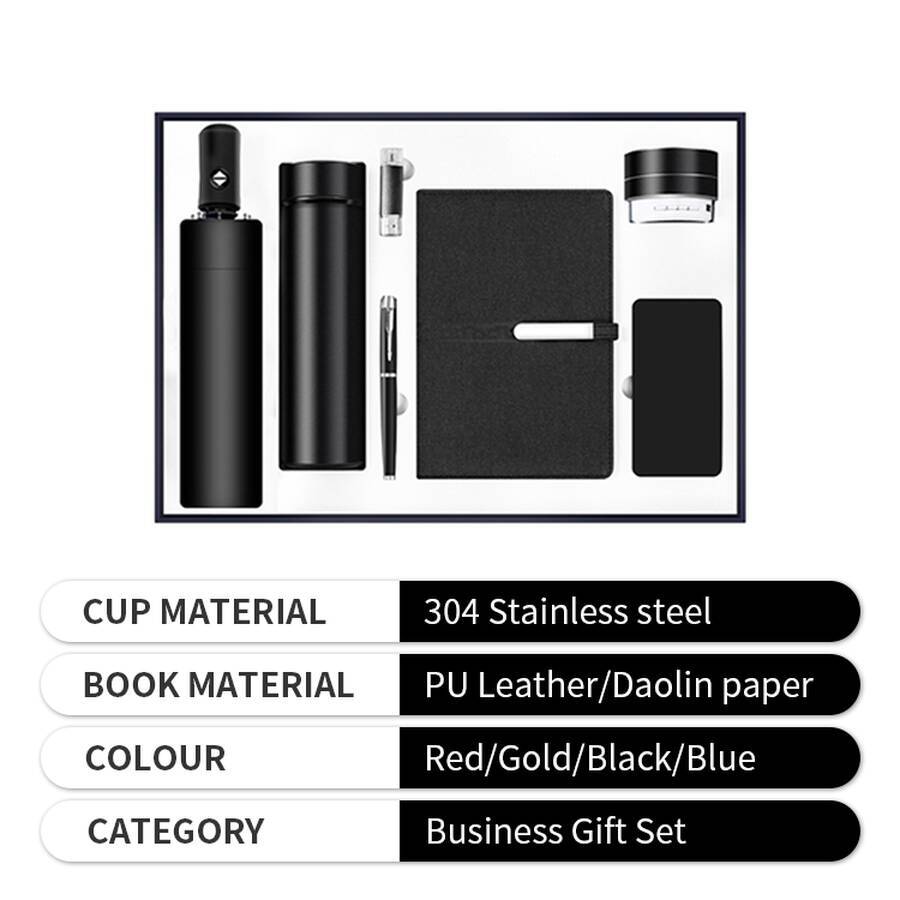
Keep Gift Sets Outside the General Stock Flow
Keep gift-set cartons separate from public giveaway stock and route them directly to the host desk, meeting room, or secure storage area. Use a separate carton series and clear destination labels.
Track completed sets by room or session, with unassigned spares kept in a separate “Program Spares” carton.
Carton Planning, Labels, and On-Site Handling
Outer cartons connect packing decisions with event execution. A useful label identifies the contents, packaging route, quantity, destination area, and sequence. Clear labels reduce unnecessary opening during receiving and support direct routing to booths, registration desks, meeting rooms, or external storage.
What a Useful Event Label Should Show
Start with carton number and total carton count, then state the packaging type and quantity. Add the event area, city, and receiving contact when required.
Large text should identify the route from a distance. Smaller fields can show project codes and inner-pack details, allowing staff to sort first and verify second.
Carrier labels, venue labels, and event-routing labels serve different purposes. A separate event label can sit beside required shipping documentation instead of competing for the same small space.
Build the On-Site Workflow Before Dispatch
The event team should know expected carton numbers, packaging routes, storage locations, and responsible roles before shipment. The workflow can stay simple: receive, verify, open, separate, replenish, track, and close.
Compare delivered cartons with the packing list before opening stock. Record visible damage and missing numbers immediately.
Confirm inner quantities, package structure, and label accuracy. If the physical layout differs from the packing list, resolve the difference before opening the rest.
Move booth stock, registration stock, staff packs, and premium sets into different zones. Keep reserve cartons outside active distribution.
Use grouped bags, bins, stacks, or session packs. Record each transfer from reserve storage into active stock.
Record refills, special handouts, damage, and transfers using the same categories across every shift.
Separate active stock, reserve stock, damage, and completed special programs. Prepare the first refill for the next event day.
Packaging Decision Matrix and Common Mistakes
No route wins every category. Compare the full event operation: product size, quantity, customization, storage, destination, handling labor, and required arrival date. The best commercial choice is the route that reduces handling friction without adding packaging the event does not need.
Control → Boxed
Presentation → Gift Set
| Factor | Bulk Pack | Individual Box | Gift Set |
|---|---|---|---|
| Handout speed | Fast for open distribution | Moderate for controlled handout | Slow and planned |
| Presentation | Simple; booth display carries the visual role | Neat, defined, easy to identify | Strongest coordinated presentation |
| Booth space | Often efficient with grouped stock | Needs more stacking and waste space | Needs secure, organized storage |
| On-site labor | Lower during handout; setup counting still matters | Moderate because boxes require handling | Higher because sets need checking and routing |
| Shipping volume | Often lower, depending on protection | Often higher, depending on box dimensions | Usually highest per complete set |
| Best control method | Inner groups and refill records | Box counts and version codes | Carton, room, and session counts |
Map Storage Before Approving Package Size
Mark the display, active stock, reserve stock, waste point, and staff path before approving package size. Compare those areas with confirmed carton dimensions.
Off-site storage reduces booth pressure but adds transfer time. Gift sets usually need a controlled area rather than open under-counter storage.
Common Packing Mistakes
One package may seem simpler during ordering but create more work on site. Divide the quantity by handout purpose before approval.
A product name does not tell staff where the carton belongs. Add booth, registration, meeting room, or warehouse information.
Mixed colors, artworks, or cards create sorting work. Separate cartons or clearly divided inner groups usually support faster setup.
Boxes, bags, and protective sheets need a collection point, while selected cartons should remain intact for leftover stock.
A Five-Question Route Test
Before approving each quantity line, ask five questions: How fast must the units move? Where will cartons stay? Who will distribute them? What must be recorded? Where will empty packaging go?
If speed dominates, compare bulk packing first. If assignment and identification dominate, compare individual boxes. If presentation and limited release dominate, compare a set format. The final route should still be checked against the selected model, quantity, artwork, destination, and schedule.
Prepare Your Packaging Requirements Before Requesting a Quote
A useful quote brief lets several packaging routes be compared on the same basis. It does not need to be long, but each quantity should connect to a use case, packaging route, destination, artwork version, and required arrival date.
Information Needed for a Packaging Quote
Map Each Quantity to a Use Case and Route
List each quantity by use: booth handout, registration, staff kit, meeting, speaker set, gift, or reserve. Separate colors, artwork versions, or destinations when they need different packing.
Confirm Destination, Arrival Date, and Approval Sequence
For each shipment, confirm the address, receiving contact, internal venue destination, carton-label fields, and required arrival date. The event date is not always the receiving deadline.
Approve the product and artwork before final packaging dimensions, then lock carton labels and dispatch details once destination information is confirmed.
Check product fit, accessories, artwork version, card position, opening experience, and the count unit used on the carton label. For a mixed-route order, review one example from each route. This small approval step is more useful than discovering a packaging mismatch after the cartons arrive at the venue.
Related Reading
Broader trade-show fan guide Custom Handheld Fans for Trade Shows Use the broader guide for fan selection and customization. This page stays focused on packaging, cartons, and event handling.Frequently Asked Questions
Get a Packaging Recommendation Built Around Your Event Plan
Send the fan model or shortlist, total quantity, expected bulk/boxed/gift-set split, artwork version, destination, receiving point, and required arrival date. If the route split is still open, compare two or three packaging options against the same quantity so handling, carton layout, storage, presentation, and event use can be reviewed on the same basis.